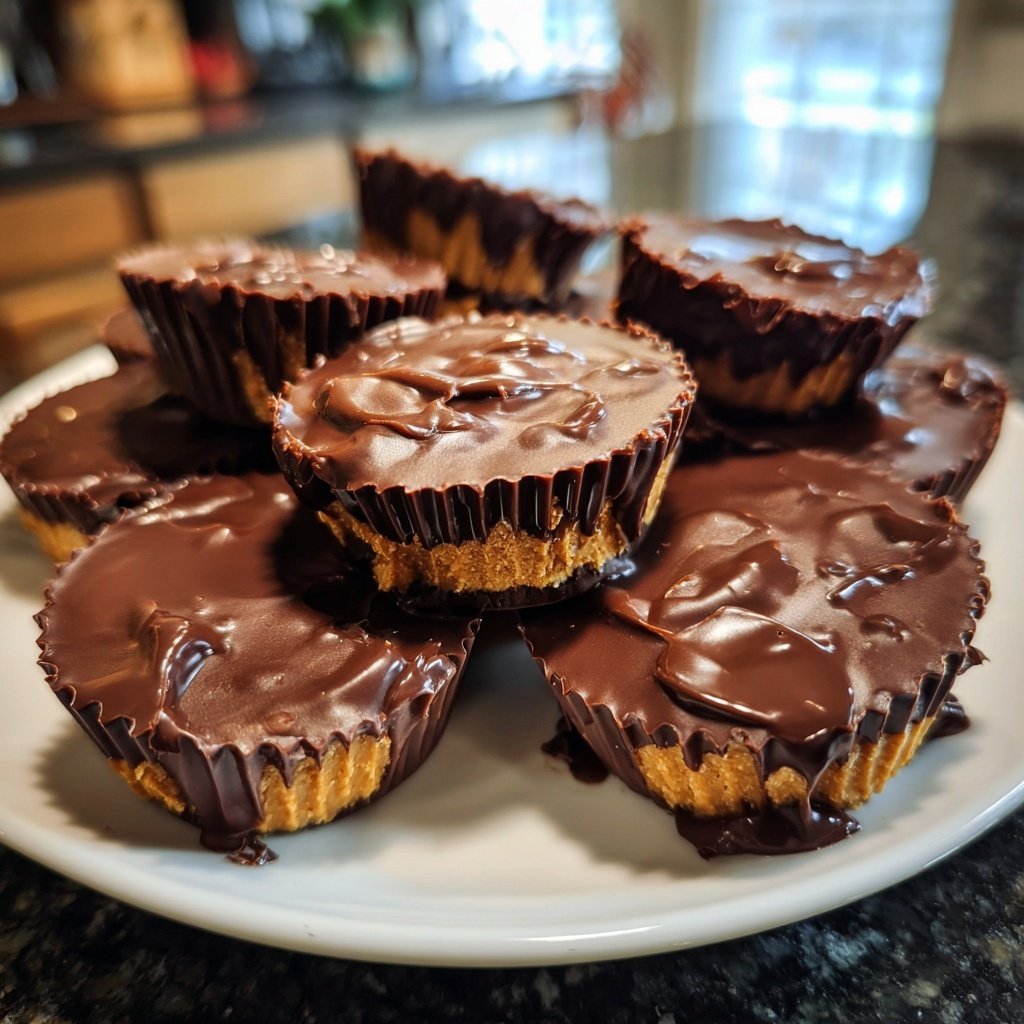
Homemade Reese’s Cups Dark Chocolate
Highlighted under: Dessert Time
I absolutely love making my own version of Reese’s Cups at home, especially in dark chocolate. The rich, bittersweet flavor of the dark chocolate perfectly complements the creamy peanut butter filling. It’s incredibly satisfying to go through the process, knowing I can control the ingredients without any preservatives. Plus, it's a fun kitchen activity that I can share with friends and family. Trust me, once you try these homemade delights, you'll never want to go back to store-bought versions!
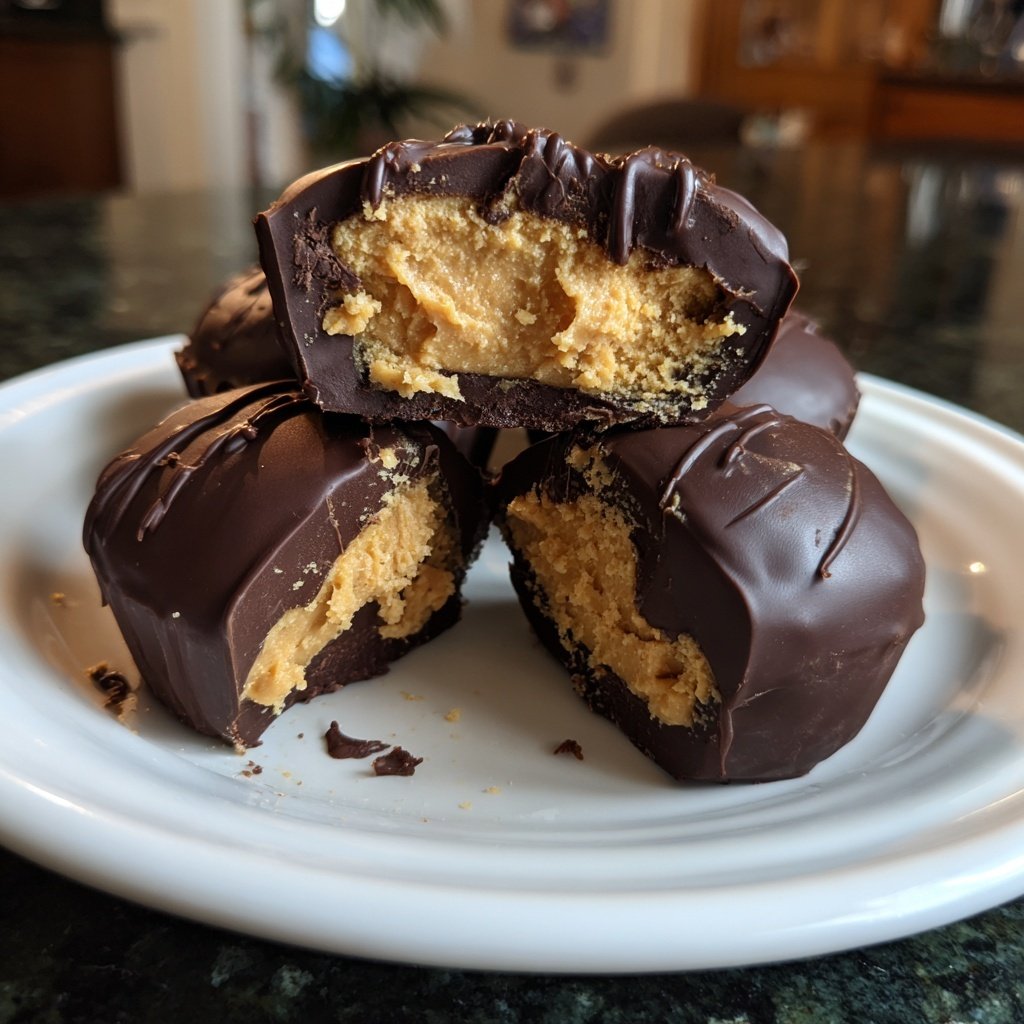
Making these homemade Reese’s Cups has been a delightful journey into the world of chocolates for me. I discovered that using real dark chocolate makes all the difference; its natural bitterness balances perfectly with the sweetness of the peanut butter filling. When I experimented with different ratios of chocolate to filling, I found that a thin layer of chocolate at the bottom and top is just enough to hold that creamy peanut goodness together without overwhelming the flavor.
One tip I can share is to use a silicone mold — it makes demolding a breeze! I learned this the hard way when I first tried using paper liners, which often stuck to the chocolate. So now, I can confidently pop out my cups, ready to enjoy or share with friends. Your kitchen will smell amazing too, making it tough to wait for them to set!
Why You'll Love This Recipe
- Rich dark chocolate that enhances the overall flavor
- Creamy peanut butter filling that beats store-bought any day
- Perfectly sized for a quick treat or a sweet gift
Key Techniques for Perfect Chocolate Cups
One of the most crucial steps in making homemade Reese's Cups is properly melting the chocolate. Microwaving in 30-second intervals allows for better control, preventing the chocolate from becoming too hot and seizing up. Stirring after each interval helps evenly distribute the heat, achieving a smooth, glossy finish. If at any point you find the chocolate too thick or grainy, adding a small amount of coconut oil can help restore its silky texture, making it easier to work with.
When preparing the molds, the thickness of the chocolate layer plays a crucial role in achieving a satisfying bite. I recommend pouring just enough to coat the bottom—about 2-3 teaspoons per cup—and slightly up the sides. This ensures you have enough space for a generous peanut butter filling while maintaining structural integrity. If the chocolate is too thin, consider adding an extra layer the next time you make these to enhance the crunch of the chocolate exterior.
Perfecting the Peanut Butter Filling
The filling in these cups is the star of the show, and using creamy peanut butter helps create that iconic texture. For a richer experience, opt for natural peanut butter—just ensure there are no added sugars or preservatives. Mixing in powdered sugar not only sweetens the filling but also helps to stabilize it, making it firmer for easier handling. If you prefer a nuttier flavor, consider substituting half of the peanut butter with almond or cashew butter for an interesting twist.
During the filling process, using a small cookie scoop allows for precision, ensuring each cup has an even amount of filling. This ultimately contributes to a balanced flavor profile as you bite into the chocolate cups. If your peanut butter mixture feels too soft, chilling it in the refrigerator for about 10-15 minutes will make it easier to scoop without spilling over the edges.
Ingredients
For the Cups
- 1 cup dark chocolate chips
- 1/2 cup creamy peanut butter
- 1/4 cup powdered sugar
- 1 teaspoon vanilla extract
- 1/4 teaspoon salt
Instructions
Steps
Melt the Chocolate
In a microwave-safe bowl, melt 1/2 cup of dark chocolate chips in 30-second intervals, stirring after each interval until smooth.
Prepare the Molds
Using a silicone mold, pour a small amount of melted chocolate into each cup, spreading it evenly along the bottom and slightly up the sides. Let it cool and set for 5 minutes.
Make the Filling
In another bowl, mix peanut butter, powdered sugar, vanilla extract, and salt until well combined. Set aside.
Add the Filling
Spoon an even layer of the peanut butter mixture on top of the set chocolate in the molds, leaving some space at the top for more chocolate.
Seal with Chocolate
Melt the remaining dark chocolate and pour it over the peanut butter layer, spreading it to cover completely. Let it set for 10 minutes.
Enjoy
Once hardened, carefully pop the cups out of the silicone mold, and enjoy your homemade treats!
Tips
Pro Tips
- For a twist, try adding crushed nuts or a sprinkle of sea salt on top before the final chocolate layer sets.
Storage and Make-Ahead Tips
Once your homemade Reese's Cups are set, storing them correctly is key to maintaining their flavor and texture. Keep them in an airtight container in the refrigerator for up to two weeks. If you prefer a firmer texture, enjoy them straight from the fridge; otherwise, let them sit at room temperature for about 10-15 minutes before serving. Additionally, don’t be afraid to batch-make these cups! They freeze beautifully for up to three months, so you can always have a supply on hand for unexpected cravings or guest visits.
To freeze, place the chocolate cups in a single layer on a baking sheet until firm, then transfer them to a freezer-safe container, separating layers with parchment paper to prevent sticking. When you're ready to indulge, simply pull them out and enjoy, ideally letting them thaw for a few minutes at room temperature to regain their creamy texture.
Gifting and Serving Suggestions
These homemade Reese’s Cups make delightful gifts for friends and family, especially with the holiday season approaching. To present them beautifully, consider packaging them in a decorative box or tin, perhaps lined with colorful tissue paper. You could even add a personal touch by attaching a labeled card with the recipe for a true DIY gift experience, letting others enjoy making them as well.
For serving, these decadent treats can be paired with a variety of drinks. A cup of strong black coffee or a glass of cold milk enhances the chocolate's richness, providing a lovely counterbalance to the sweetness. You can also get creative by garnishing with a sprinkle of flaky sea salt on top of the chocolate layer for an elevated flavor experience that contrasts the sweetness with salty goodness.
Questions About Recipes
→ Can I use milk chocolate instead?
Yes, but keep in mind it will be sweeter and less intense than dark chocolate.
→ How should I store these cups?
Store them in an airtight container in the fridge for up to a week.
→ Can I make them vegan?
Absolutely! Just use dairy-free dark chocolate and a suitable peanut butter substitute.
→ What can I use instead of peanut butter?
Almond butter or cashew butter can work as tasty alternatives.
Homemade Reese’s Cups Dark Chocolate
What You'll Need
For the Cups
- 1 cup dark chocolate chips
- 1/2 cup creamy peanut butter
- 1/4 cup powdered sugar
- 1 teaspoon vanilla extract
- 1/4 teaspoon salt
How-To Steps
In a microwave-safe bowl, melt 1/2 cup of dark chocolate chips in 30-second intervals, stirring after each interval until smooth.
Using a silicone mold, pour a small amount of melted chocolate into each cup, spreading it evenly along the bottom and slightly up the sides. Let it cool and set for 5 minutes.
In another bowl, mix peanut butter, powdered sugar, vanilla extract, and salt until well combined. Set aside.
Spoon an even layer of the peanut butter mixture on top of the set chocolate in the molds, leaving some space at the top for more chocolate.
Melt the remaining dark chocolate and pour it over the peanut butter layer, spreading it to cover completely. Let it set for 10 minutes.
Once hardened, carefully pop the cups out of the silicone mold, and enjoy your homemade treats!
Extra Tips
- For a twist, try adding crushed nuts or a sprinkle of sea salt on top before the final chocolate layer sets.
Nutritional Breakdown (Per Serving)
- Calories: 380 kcal
- Total Fat: 26g
- Saturated Fat: 15g
- Cholesterol: 195mg
- Sodium: 85mg
- Total Carbohydrates: 32g
- Dietary Fiber: 3g
- Sugars: 24g
- Protein: 6g